
iBeesoft DBackup 2.0
iBeesoft data backup and drive clone software can be maximizing backup protection for your files, partitions, disks, and the whole operating system. When a disaster happens, it can easily and quickly restore everything.
iBeesoft data backup and drive clone software can be maximizing backup protection for your files, partitions, disks, and the whole operating system. When a disaster happens, it can easily and quickly restore everything.
A reliable, fast and complete backup tool enables you to back up everything you need on the computer, including file, hard drive/partition, system and even external drives, protecting your important data. The data backup tool has automatic backup options makes it easier and more efficient for you.
Select folders or files you want to backup. The file backup software supports back up all file types to the hard drive, USB drive, and more.
Clone a hard drive or USB drive, making it done with high-efficiency. It’s especially important if you have the drive stored your important files.
Image back up of your entire OS hard drive or partition, in case of restoring both the operating system and data when you need.
Customize your backup types, the full image, incremental, or differential, customize location and schedules. It fully depends on your needs.
It works in the background if you have set it up beforehand. Any backup program worth its salt allows you to schedule backups.
Back up the selected files, folders, or volumes alone, without any interruption of the current operations, especially for open files backup.
Easily and safely clone system or disk for the purpose of data protection, transferring to bigger hard disk for backup
Easily clone disk for the purpose of data protection, avoiding data loss due to the virus, operating system crash, intentionally or unintentional deletion, ensuring you never miss anything important, especially something related to education, business or privacy. It clones everything you need:
System Clone
Clone Hard Drive
Partition Clone
Clone USB Drive
Memory Card Clone
Clone Other Drives
Whenever your system crash, you can try the Boot Media and the System Backup to restore it. So does the deleted data when disaster happens, it will get everything from your backup file. It’s easy, safe and reliable. You've ensured everything is under controlled.

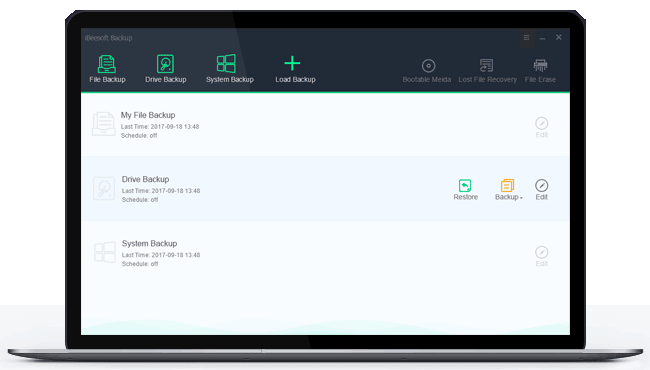
The comprehensive backup and recovery solutions have built-in navigation to make back up your data/drive/system with simple steps. You can schedule the backup time and choose the backup function. Restore your data with the backup whenever you need.
Step 1: Click a backup modes, you can select "File Backup", "Drive Backup" or "System Backup".
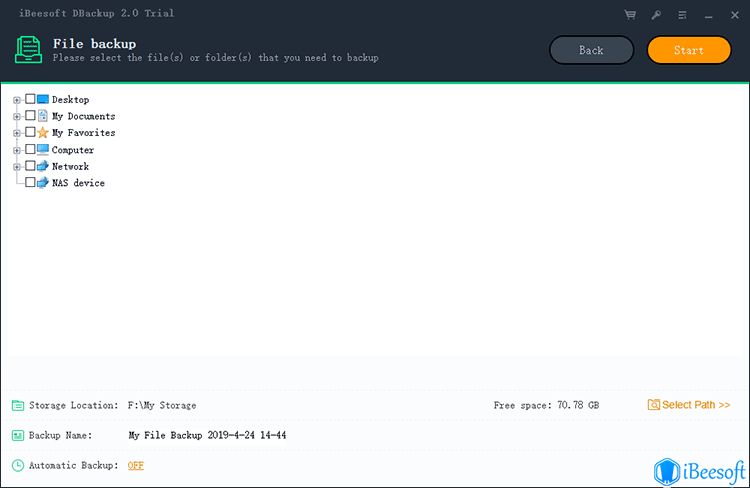
Step 2: Select the file/driver/system that you want and setting a backup time, then click "Start" to back up.
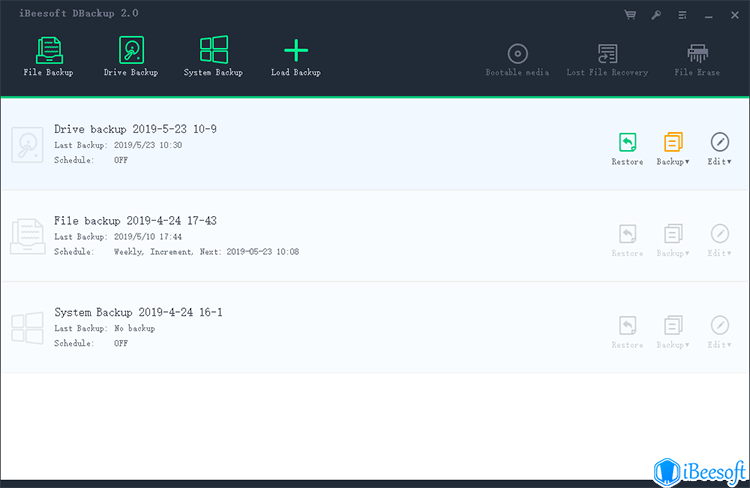
Step 3: When the backup is complete, you can edit the backup image again and restore the data you need.
"It's a great drive and file backup tool. It can automatically perform incremental backups, saving me a lot of time. When you are in trouble, it is easy to restore them."

Oswald
"This Windows image backup software works very well, and I can set a time for it to run automatically. A very simple tool. Best regards!"

Feldman
"iBeesoft providing a reliable, safe program for data or drive backup. Unlike most backup software, it runs faster and has smaller image files. It can also be transferred to other computers to complete the universal restore. It is an excellent backup software!"

Maurice
"Thanks to its intuitive layout, I can quickly back up my files and Windows system. Schedule option that allows this data backup software to automate the work you need to do. iBeesoft DBackup is a great tool."

Joyce
System: Windows 10/8/8.1/7/Vista/XP
Disk Space: A minimum of 1GB of available space on the hard disk
CPU: 1GHz processor or faster
RAM: equal or larger than 1GB
Hard Drive:Parallel ATA (IDE) HDD, Serial ATA (SATA) HDD, SSD etc.
USB Drive: USB 1.0/2.0/3.0, flash drive, etc.
Card Storage: Memory/SD Card, CF Card, Smart Card etc.
Large Storage Device: RAID, Large-capacity Drive etc.